Lab Journal - NetBird Routing Peer
Setting Up a NetBird Routing Peer
Welcome! In this post I’ll be explaining how to set up a NetBird routing peer for remote access to your homelab. I’ll also be going though the challenges I faced trying to achieve high availability (HA) and why true HA didn’t work out for me.
This post assumes you have some experience with NetBird and have an instance set up already. I’ll be walking through a minimal Alpine setup in Proxmox, accessing the box through the serial console, and then installing Netbird on it. I’ll be setting the peer up as a routing peer with a basic ACL and disabling NATing for traffic entering my lab network from the VPN, which includes setting up routing on my OPNSense device. Feel free to follow along!
Background
Originally I was routing all my Netbird traffic through Aura, my baremetal NixOS install. This worked well for a while, but the Netbird client is unfortunately outdated on NixOS 25.05, which was my OS version at the time. This worked fine for me at first, but while more thoroughly testing the WebSocket relay mode I updated my Netbird server containers, and it looks like this version of the client stopped working completely. My solution was to set up an Alpine box in my Proxmox cluster rather than try get the NixOS client working. I’d already tried to use the container version of the client on NixOS but due to some container networking quirks of the OS, I wasn’t able to use it to route traffic off the host.
Setting up an Alpine box as a routing peer was something that would be quick and easy to replicate, so that’s what I did and it’s been working well for me since. Today I’ll be setting up the second Alpine box as a fallback for this setup.
The Tutorial
1. Downloading Alpine
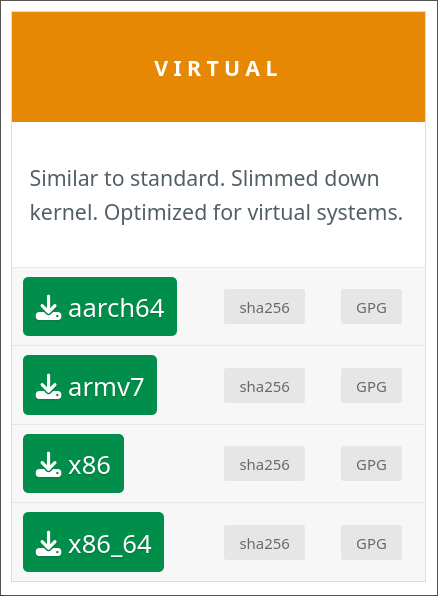
The first step is to download the version of Alpine we’ll be using to Proxmox. You can find download page here.
Scroll down to where it says ‘virtual’ and select a version that matches your architecture (NetBird is currently available on all architectures Alpine is). Choosing the virtual image will give us automatic serial support, which speeds up the setup process significantly.
Navigate to ‘local’ under your Proxmox node and enter the ISO images menu. Generally I prefer to download my images directly to Proxmox so I don’t have to download the image then re-upload it from my laptop, so I’ll copy the direct link here.
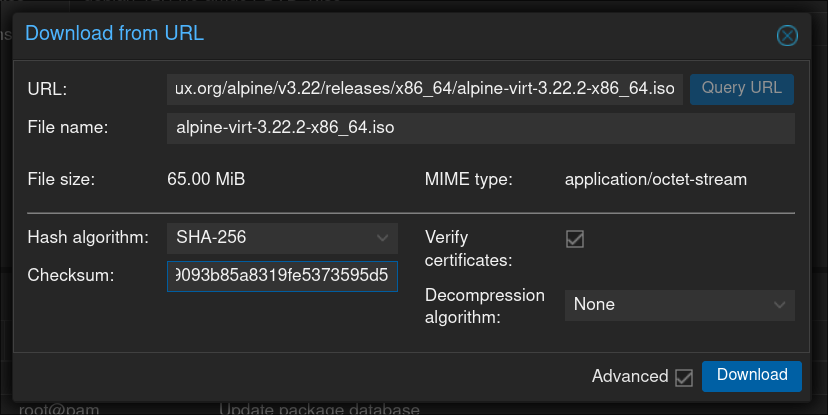
Hashes are also available on the Alpine page if you’d like the verify the integrity of your image. The download should be quick as it’s only about 70MB. After we’ve done this we can set up the VM.
2. VM Setup
I won’t go through the full process of setting the VM hardware, if you’ve used Proxmox before it’s nothing special, but essentially I give it:
- 1 CPU core, host CPU
- 512MB of RAM (though I recommend starting with more during setup)
- 1GB of SCSI storage
- A serial port for the console (may have to be added after initialisation)
- And of course a network device
While we don’t necessarily need the QEMU guest agent, there’s rarely harm in enabling it and it can do a lot in the background to improve performance.
3. Alpine Install
First we’ll go through the initial setup for Alpine (as appropriate for your environment):
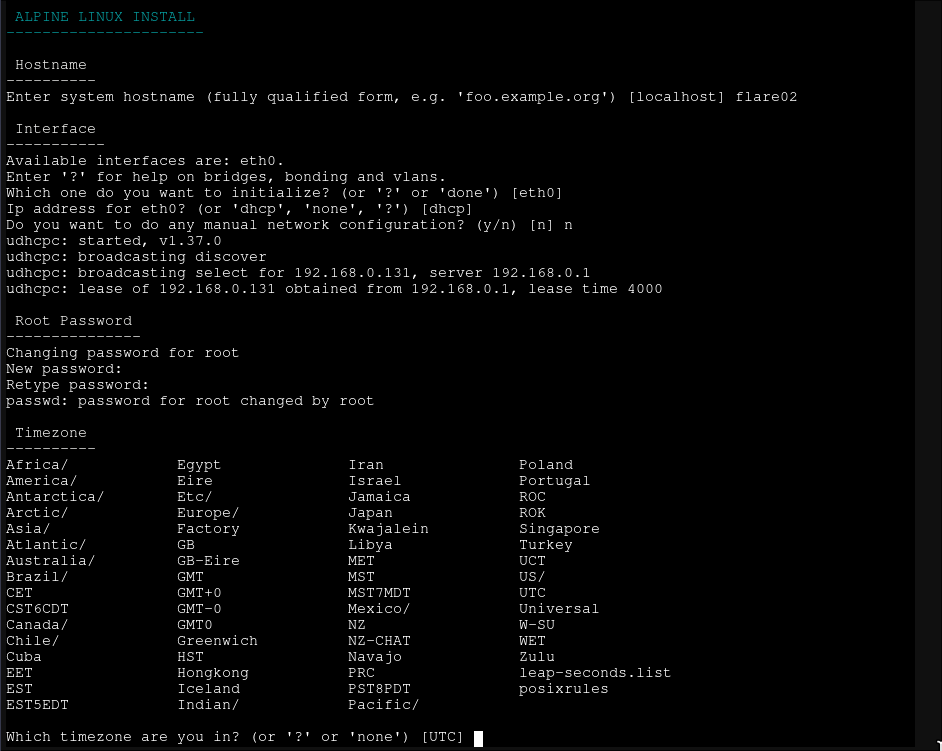 This is mostly dependent on your preferences, but always choose a strong root password.
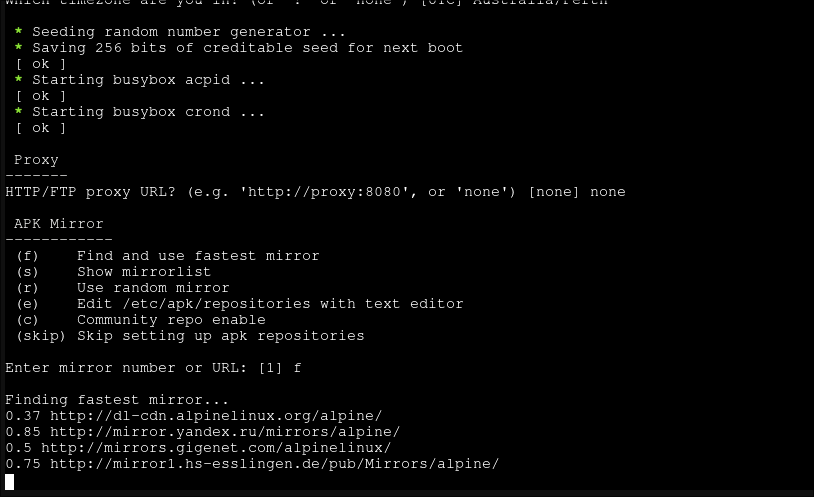
I generally just pick the fastest mirror, though this will take some time to work out. If you’re on 3.23 or above, I’d recommend enabling community repositories here as you’ll be able to install NetBird directly (unfortunately not an option when I started writing).
This is mostly dependent on your preferences, but always choose a strong root password.
I generally just pick the fastest mirror, though this will take some time to work out. If you’re on 3.23 or above, I’d recommend enabling community repositories here as you’ll be able to install NetBird directly (unfortunately not an option when I started writing).
 I don’t set up a user because we’re just using this for NetBird and not running any other services. I can’t log in externally so there would be very little security difference. If you intend to leave a console open for some time and are planning on doing a lot of work on the machine, you could set up a user for sudo, but I generally won’t be touching this. I also don’t set up SSH for the sake of reducing attack surface, the Proxmox serial console makes terminal usage easy.
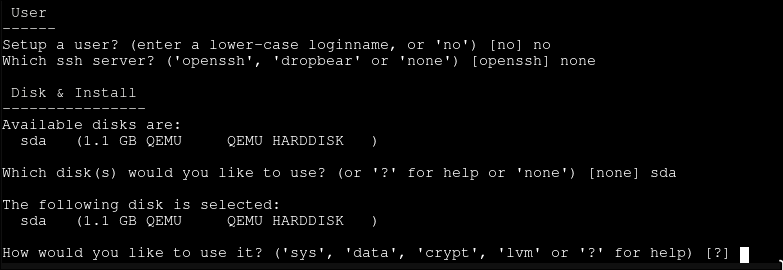 If you’re unsure about partitioning, just choose ‘sys’. This is essentially a standard install with the whole filesystem on one partition; if you’re just using this as a routing peer there’s no need to be too fancy.
This should be the last step to the installation, and you can now reboot into your system. Assuming you did choose the VM image for Alpine, the serial port should be working automatically and you can open the VM in Xterm.js mode:
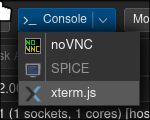 This will be handy for copying and pasting when we set up NetBird.
4. Installing NetBird
There are two main ways to install NetBird on Alpine. If you’re on 3.23 or above, NetBird is included in the community repository which makes installation simple by going through the package manager. This is likely your best option, but there is also an installation script if you need to use a lower version or have specific requirements that prevent you using the package manager.
Option 4.1: Package Manager (Post-3.23)
A quick # apk add netbird will do the trick here. This is definitely the best option for most people, but when I did my installation 3.23 was not out yet, so I used the install script. If you’re not on 3.23 but would like to be, take a look at this wiki page.
Option 4.2: Install Script (Pre-3.23)
The advantage of this approach is that you don’t need to upgrade to 3.23 or higher, however you’ll be installing without a package manager. This isn’t usually my preference generally because I like to keep my installs organised, but since this is the only software we’re installing it’s quite viable.
NetBird actually makes this approach quite straightforward with an install script.
The first step is to install curl to download the script, and nano (or your preferred editor) to read the script before running it (we do not condone curl | sh here!):
1
apk add curl nano
After we install these, we can download the script, check it over, and then run it.
1
2
3
4
5
6
7
8
# Download the script, use -L as there is a redirect
curl -Lo install-netbird.sh https://pkgs.netbird.io/install.sh
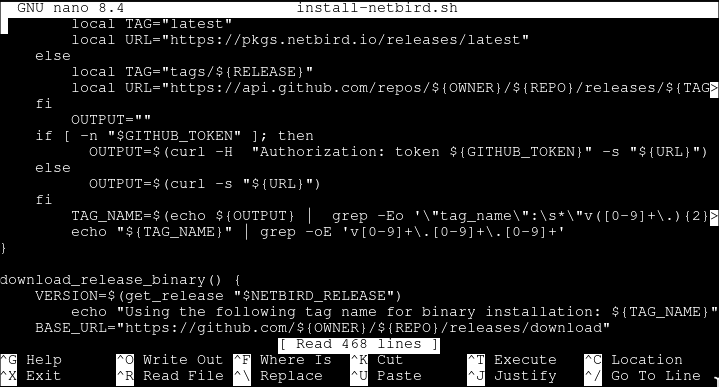
# Check out the install script and make sure you're happy with what it does
nano install-netbird.sh
# Run the install
sh install-netbird.sh
# Remove the script when we're done with it
rm install-netbird.sh
The script in nano:
And we’re done! We’ll set it up in just a moment.
5. Connecting to NetBird
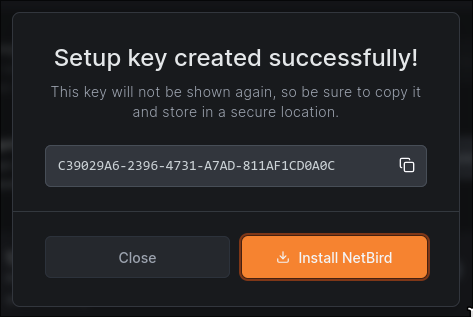
The first thing we’ll do is navigate into NetBird and create a setup key. This means this peer won’t be attached to a particular account, which works well in my setup. We can also prevent its session from expiring, meaning if it goes down it can automatically come back up without us having to give it a new key.
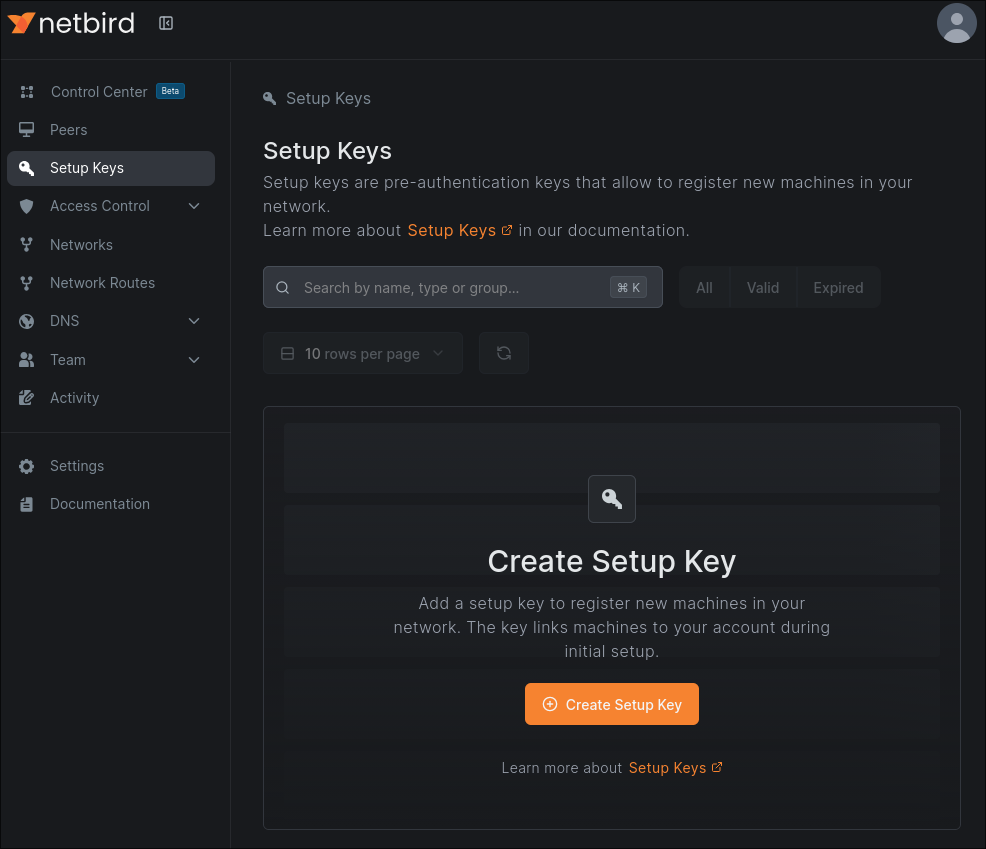 Click the ‘Create Setup Key’ button and create your key. I recommend making this a one-time use and giving it a short expiry if you don’t need to deploy new hosts en masse.
We can now run the command.
1
$ netbird up --management-url <YOUR MANAGEMENT URL> --setup-key <YOUR SETUP KEY>
*Note that a management URL is not required if you’re using a SaaS instance hosted by NetBird.
And we’re connected!
 Once you’ve connected the host, make sure to delete the setup key if you’re done with it.
6. Setting up a Network
You should now be able to see the host in your NetBird dashboard, and more importantly, we can set it up as a routing peer. Navigate to the ‘Networks’ tab, and either set up a new network or select an existing one.
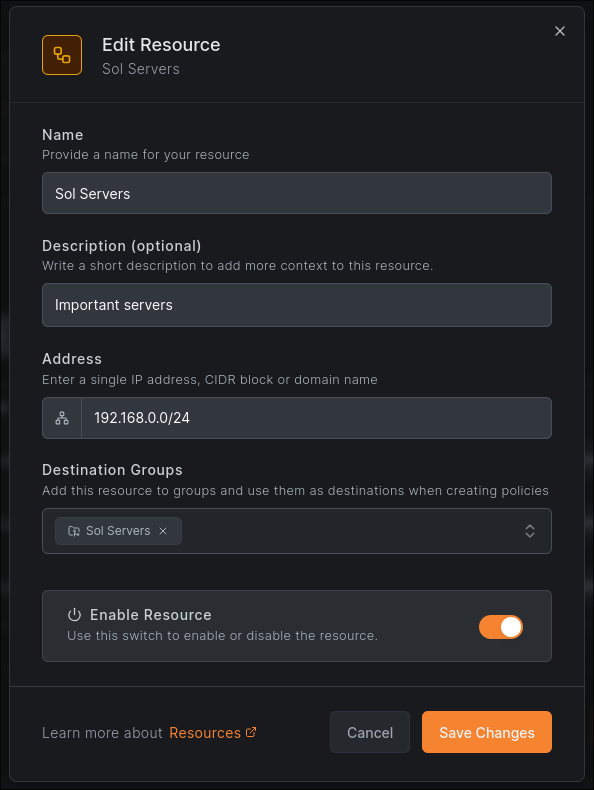
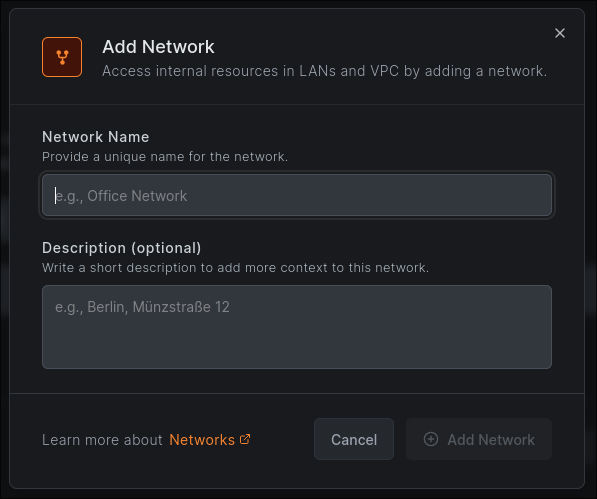 If you’re creating a new network, make sure to add some resources like so:
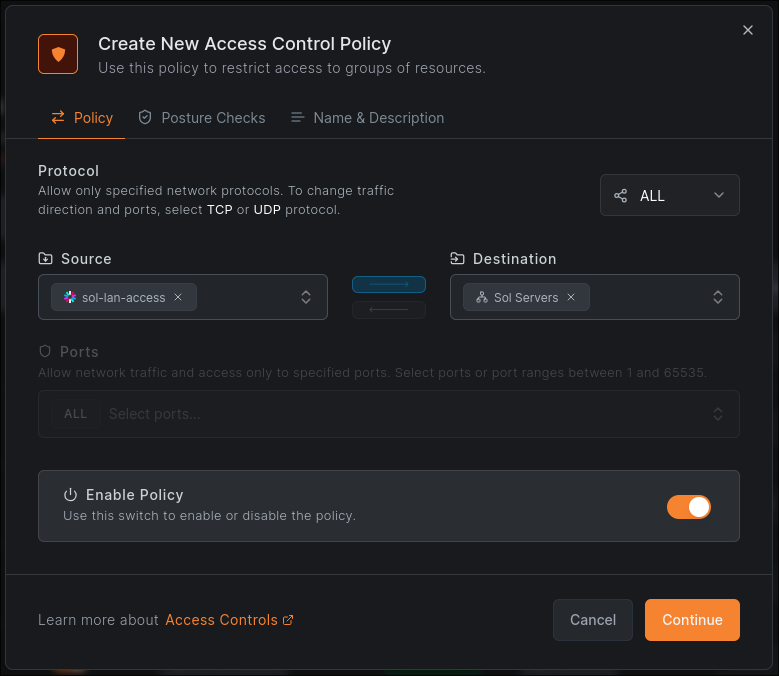
 To actually have peers access our resources, we’ll also need to set up ACLs. This is done under the ‘Access Control -> Policies’ tab and can be as simple as mapping a resource to a group or role assigned by your identity provider. The example below lets anyone with the role ‘sol-lan-access’ access the ‘Sol Servers’ resource from before.
 The important part of this is having at least one device that can’t access your resources without using the VPN so we can use it to test, and making sure this device is allowed through by NetBird’s ACLs.
Towards the bottom of the network settings should be an option to add a new routing peer which allows us to actually use the network by sending traffic from NetBird through this device.
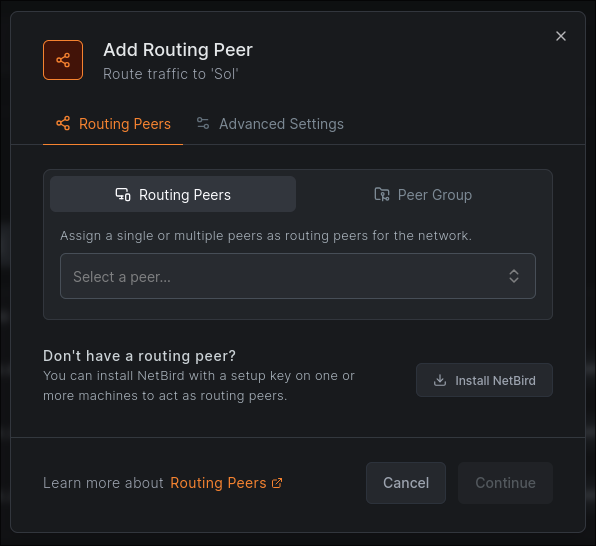 You can choose to add the peer individually, or you can choose to use a whole group as routing peers for the network. In this case, any new routing peer just needs to be added to the group. If you’re following my setup and intend to disable NATing (explained soon), you’ll need to add peers individually.
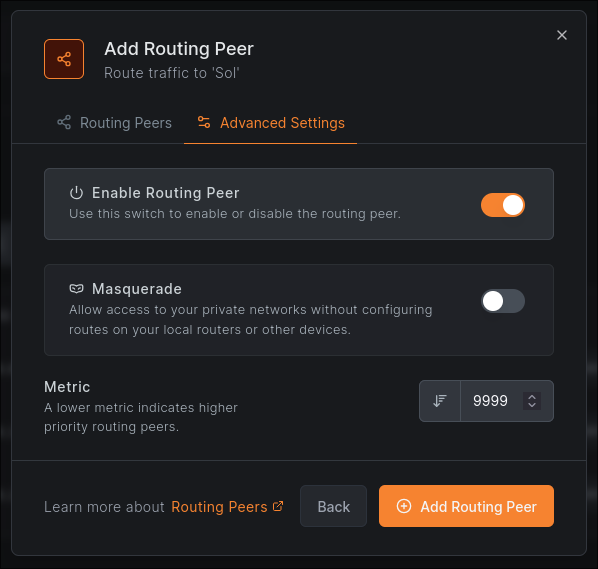 After this we can configure advanced settings. The main important option here is ‘Masquerade’. If you have a simple lab setup that only you use, it’s fine to leave this on, however if you’re setting up NetBird for a business or a large lab with multiple users, I highly recommend disabling it. Take note of the ‘Metric’ setting too, because if you do choose to work without NAT, you’ll need to adjust this later.
Having masquerade enabled on a routing peer NATs traffic going into the target network, which means all traffic will appear to be from the routing peer’s internal IP address for that network. This presents two main issues:
- Logging
- Firewall rules
Internal NAT can be a nightmare for a SOC or incident response team as during an attack, it can be extremely difficult to work out the origin of the traffic coming into the network. It also means we lose fine-grained firewall rules. NetBird peers can be set up to use particular IP addresses, which we can leverage in firewall rule creation within the network if you don’t trust ACLs on their own. It also means our rules will be more clear about the actual origin of the traffic, as opposed to specifying the internal IP of the routing peer; it forces us to acknowledge the traffic is from outside the network and treat it as such.
My lab is designed to be shared, so I’ve disabled NATing. If you’re also planning to turn off masquerade, do not enable the routing peer yet. We’ll need to set up routes in our router first, and enabling the peer now, especially if it has a higher priority than other peers you may already have for the network, will break your connection.
If you are using NATing, congratulations, you’re done! I hope you enjoy your new routing peer. If not, read on to find out how to set up routing rules in OPNSense to make sure traffic gets sent back into NetBird correctly.
7. Working Without NAT (Optional)
Important note: if you’re going down this route, make sure your routing peers are in a different subnet than the devices you’re routing to. This is explained more in the ‘Challenges’ section, but traffic will not route correctly if your routing peers and target devices are in the same subnet.
The first thing you’ll need to do to set up routes in OPNSense is set up your routing peer’s LAN IP as a gateway. These settings are in ‘System > Gateways > Configuration’ and this is what the gateway settings look like:
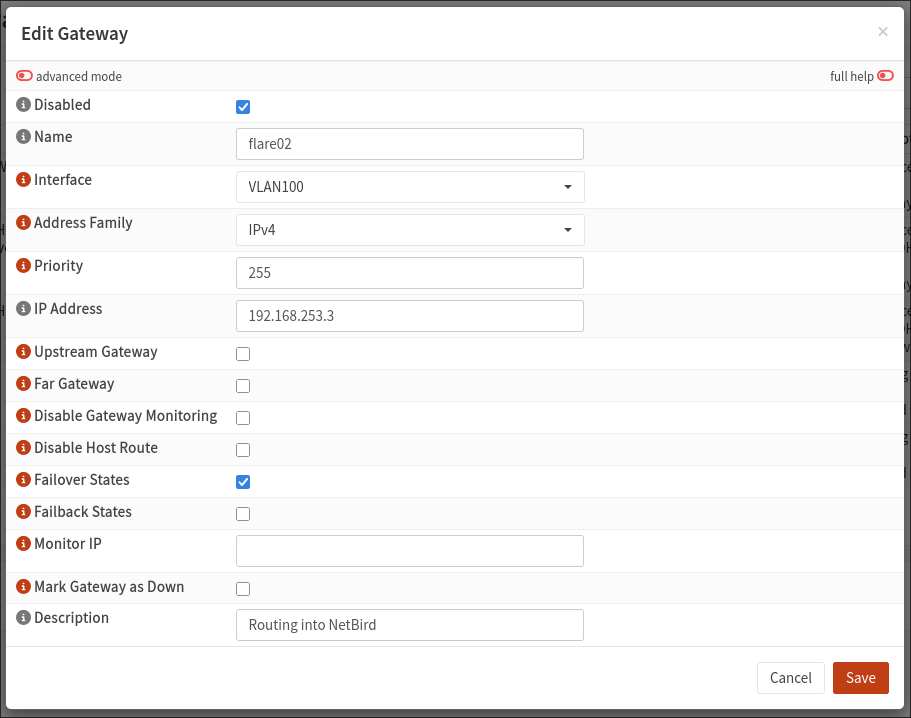 This is fairly self-explanatory, just make sure to choose the correct interface. What I did and what I recommend you do if you’re making any attempt at HA, is make sure gateway monitoring is on and enable failover states so that traffic can continue through a backup gateway if this one goes down.
This is approximately what the gateway will look like after setup:

7.1. Routes
Now that we have the gateway set up, we need to define routes. There are two ways of doing this; normal routes or gateway groups. I’ll go through both because I originally set up gateway groups, but as I was unable to achieve high availability in this way, normal routes are definitely a better beginner choice.
Option 7.1.1: OPNSense Routes
Routes are accessible in ‘System > Routes > Configuration’. Setting one up is pretty simple, just define one using your new gateway like so:
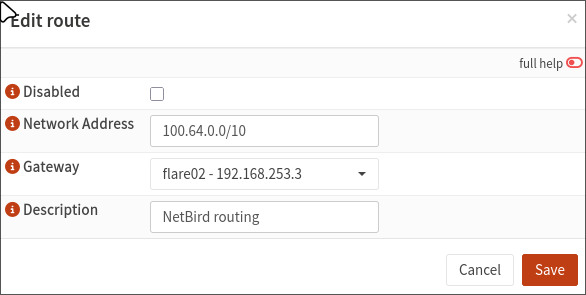 NetBird runs a network somewhere in the 100.64.0.0/10 range, so if you don’t have other networks in this range, you can route any traffic from this range into your routing peer and have it sent to NetBird. If you want to be more specific, NetBird uses a /16 network inside this range. You can find this by checking the NetBird IP of any of your devices. It will look like
 100.xxx.yyy.zzz. To route specifically to this network, your network address should be 100.xxx.0.0/16.
Save this and make sure it’s enabled:
 The tickbox on the left is labelled ‘disabled’, so having the route checked actually turns it off.
The caveat of this method is that only one gateway is effective for a route at a time. This is fine if you have one routing peer, and can work in theory as with some debugging you can see that which gateway is active and then turn the other one off in NetBird. Unfortunately though, enabling both in OPNSense at the same time still won’t result in real HA as when one goes down you’ll still have to enable the other in NetBird, and it can be flaky when OPNSense or NetBird start routing things through a different gateway as there doesn’t seem to be a guarantee that traffic will start going through the original when it comes back up.
What I’ve found works best in this kind of setup is:
- In terms of routes, the bottom route in the route settings takes precedence if multiple are enabled
- In my testing, it seems this is more important than the gateway priority
- A lower priority value for the gateway may improve the chance of it being used for routing too (make sure the bottom route has the lowest ‘priority’ value too)
- Priority is generally documented to be used for selecting a default gateway, so this is unclear
- A lower metric in NetBird means the peer will be chosen over others for routing (set the lowest metric on the peer with the bottom route in OPNSense)
Then in the case of a failure things can get a bit messy.
- On the initial failure, OPNSense and NetBird both fall back to the next routing peer, possibly with a small interruption as the peer probably won’t be registered as down on both products at the same time
- Network traffic will continue for some time on the backup peer
- When the original comes back online, OPNSense will resume routing through it. NetBird will not
- You’ll need to manually disable the backup routing peer, then enable it again
It’s unclear if NetBird will correct itself if left long enough, but it didn’t for me in the small amounts of time I left it to test this. Overall, this could help you achieve some level of HA, but I couldn’t recommend it in a production setup because it seems very dependent on undefined behaviour. In my environment, I just keep one routing peer enabled and will enable the other if the first goes down.
If you choose to use this for high availability or know more about the gateway selection process in OPNSense, feel free to reach out, I’d be interested to know how it goes. Otherwise, I hope this method helped!
Option 7.1.2: Gateway Group (Experimental)
Theoretically, you could set up gateway group to solve this issue as well, and this is what I did at first. This would allow routing to continue through another gateway if one failed in a more deterministic way than normal routes, but I didn’t get a lot of use out of it. I’ve included an explanation of how these work and how to set them up mostly in case you want to have a go at high availability yourself.
Essentially gateway groups allow you to combine multiple gateways for the same route, choosing which one to use based on a tier. This is technically a more stable version of my hacky findings on generic routes.
Gateway groups are available in ‘System > Gateways > Group’, all we need to do is add a new group and specify our priorities:
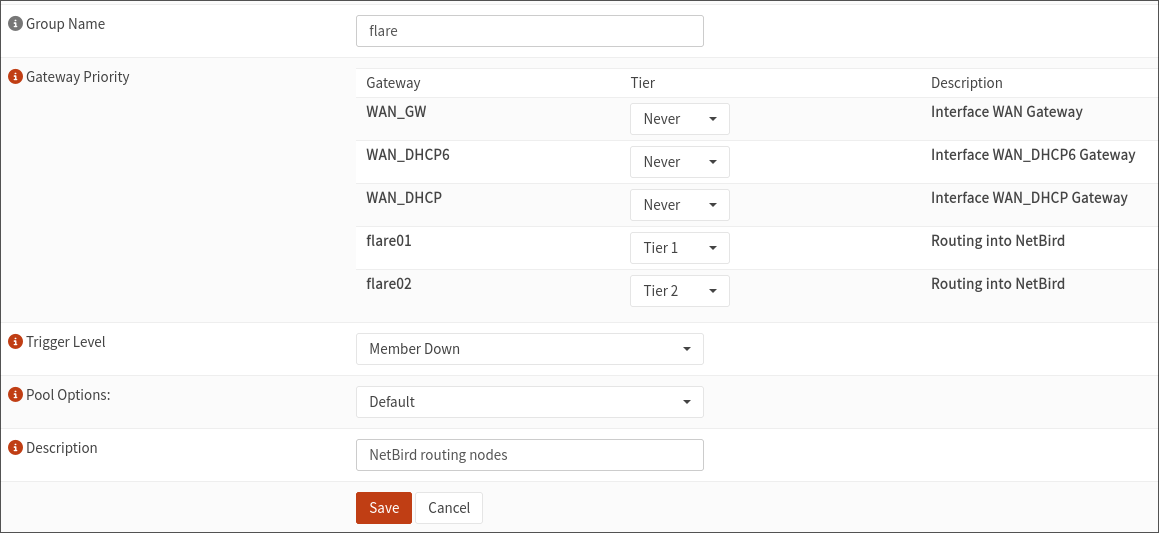 Tier 1 is used over Tier 2, and so on. As a lower metric in NetBird corresponds to a higher priority as a routing peer, ensure your Tier 1 gateway has the lowest metric, then increase for each lower tier.
To configure the actual routes, we’ll need to use the firewall as OPNSense doesn’t allow routing groups to be used in static routing settings.
Head to the firewall settings for the interface that needs to be accessed by the VPN and add a new rule. You’ll notice that towards the bottom there’s a ‘gateway’ option:
 We just need to select our gateway group here and traffic will be routed through it. When choosing the destination, your VPN should be within the 100.64.0.0/10 address space, but you can check your NetBird config for more specific details. Using this method, you can set up firewall rules that route traffic through a specific gateway group and make sure any traffic sent to the VPN range is actually routed through your routing peers.
If you choose this method, good luck! It didn’t work out for me but you may have more luck. Just ensure that a lower metric setting in your NetBird routing peers matches a stronger tier in OPNSense (Tier 1 should have the lowest metric). Contact me if you have success with this, I’d be interested to implement it myself and update this post.
8. Conclusion
Thanks for following along! You should now have remote access to your lab, feel free to connect another device to NetBird and ping one of your network resources to test it out. As long as ACLs allow it, you should get a response back now. The next section is going to be about the challenges I faced especially in trying to get HA working and why it didn’t work out, so read on if you’d like to find out why there doesn’t seem to be a good solution right now, otherwise feel free to skip over.
Challenges
There were a lot of challenges I faced trying to get this working. My OPNSense setup was new and quite minimal at the time, and I had some misconceptions about how deterministic the routing process would be. This led to be trying in vain for weeks to set up high availability and never fully succeeding. What I have now is still two peers, but only one is enabled. If I have issues with one peer, I need to enter a sort of debugging state, turning that peer off but enabling my backup peer with masquerade on (as routing rules in OPNSense refer to the other peer) to get into my network to fix the issue. It’s not as seamless as I wanted, but as of currently I haven’t found a better way.
Routing Priority Issues
Originally when I started this project I’d thought that NetBird’s metric setting for the routing peer and OPNSense’s priority for gateways in a gateway group would be deterministic if the host was known to be online. This was not correct. I had set up my new routing peer with a lower priority in NetBird and OPNSense under the assumption that it would only be used when my main peer was down, but this isn’t what happened. Instead, traffic would sometimes go through the backup peer anyway, and come back through the main peer. This would interfere with state tables and lead to broken connections, as each packet could theoretically be routed through a different peer. I’m unfortunately not skilled enough with NetBird internals, OPNSense, or networking in general to know how to fully resolve this issue, but it seems like NetBird and OPNSense would have to communicate in some way, or I need to have the backup peer offline until it detects that the main peer goes down. Eventually I do plan to try find at least somewhat of a workaround like this, but as it stands the important thing is I can still get in to recover from any issues remotely.
Routing Peer Subnets
This is another issue caused by me being pretty new to anything more advanced than home networking, but at first I tried to put my routing peers on the same subnet I had most of the devices from before I installed OPNSense. This was a mistake.
For hours, I was struggling to work out why devices in my lab communicating over specifically TCP were receiving traffic but my NetBird peers didn’t get any responses back. I eventually discovered the following issue:
- A SYN (open connection) packet is sent to the routing peer to be sent into say 172.16.0.0/24, this comes from a 100.64.0.0/10 address.
- The routing peer, also on 172.16.0.0/24, has the destination host in its ARP table.
- Being on the same switch, the SYN packet is sent directly to the destination without going through the router (this already will cause issues for the firewall)
- The destination host needs to respond with a SYN+ACK for its part in the handshake.
- Knowing the origin IP in 100.64.0.0/10 is outside of its subnet, it contacts the router to route the packet out of the subnet.
- The router, seeing a SYN+ACK packet appear out of the blue to a random external IP address is confused, but it knows this is not how you play TCP and drops the packet, silently killing the connection before it actually started.
UDP worked fine, DNS was actually the only thing not broken in the environment, but nothing else I tried worked until I realised the firewall logs were only showing me traffic going out to NetBird and nothing that was coming into the lab.
In the end, the fix wasn’t really an issue and was something I intended to do anyway, I just changed the VLAN of my routing peers and set them up in their own network.
Addendum
What I thought would be a quick afternoon project ended up turning into a weeks-long adventure. Unfortunately life got hectic, work got even busier, and then when it was almost over one of my Proxmox nodes looked to be dying, so I had to quickly extract everything important and learn how to recover the cluster member just in case, and then Alpine 3.23 came out and I had to go back through and modify most of what I’d written about the installation process. But ultimately we got there. I hope this is useful to you, and I’ll see you next time 👋